

Your account is personal: it belongs to you, not to an organization. It holds your name, email address, language, password, two-step verification, notification settings, your own SSH keys and your API tokens. The same account gives you access to every organization you are a member of.
Open your account through the account menu at the top right (your initial and name) and choose Account settings. The account has seven pages in the left rail: General, Security, Privacy, Notifications, SSH keys, API tokens and Legal.
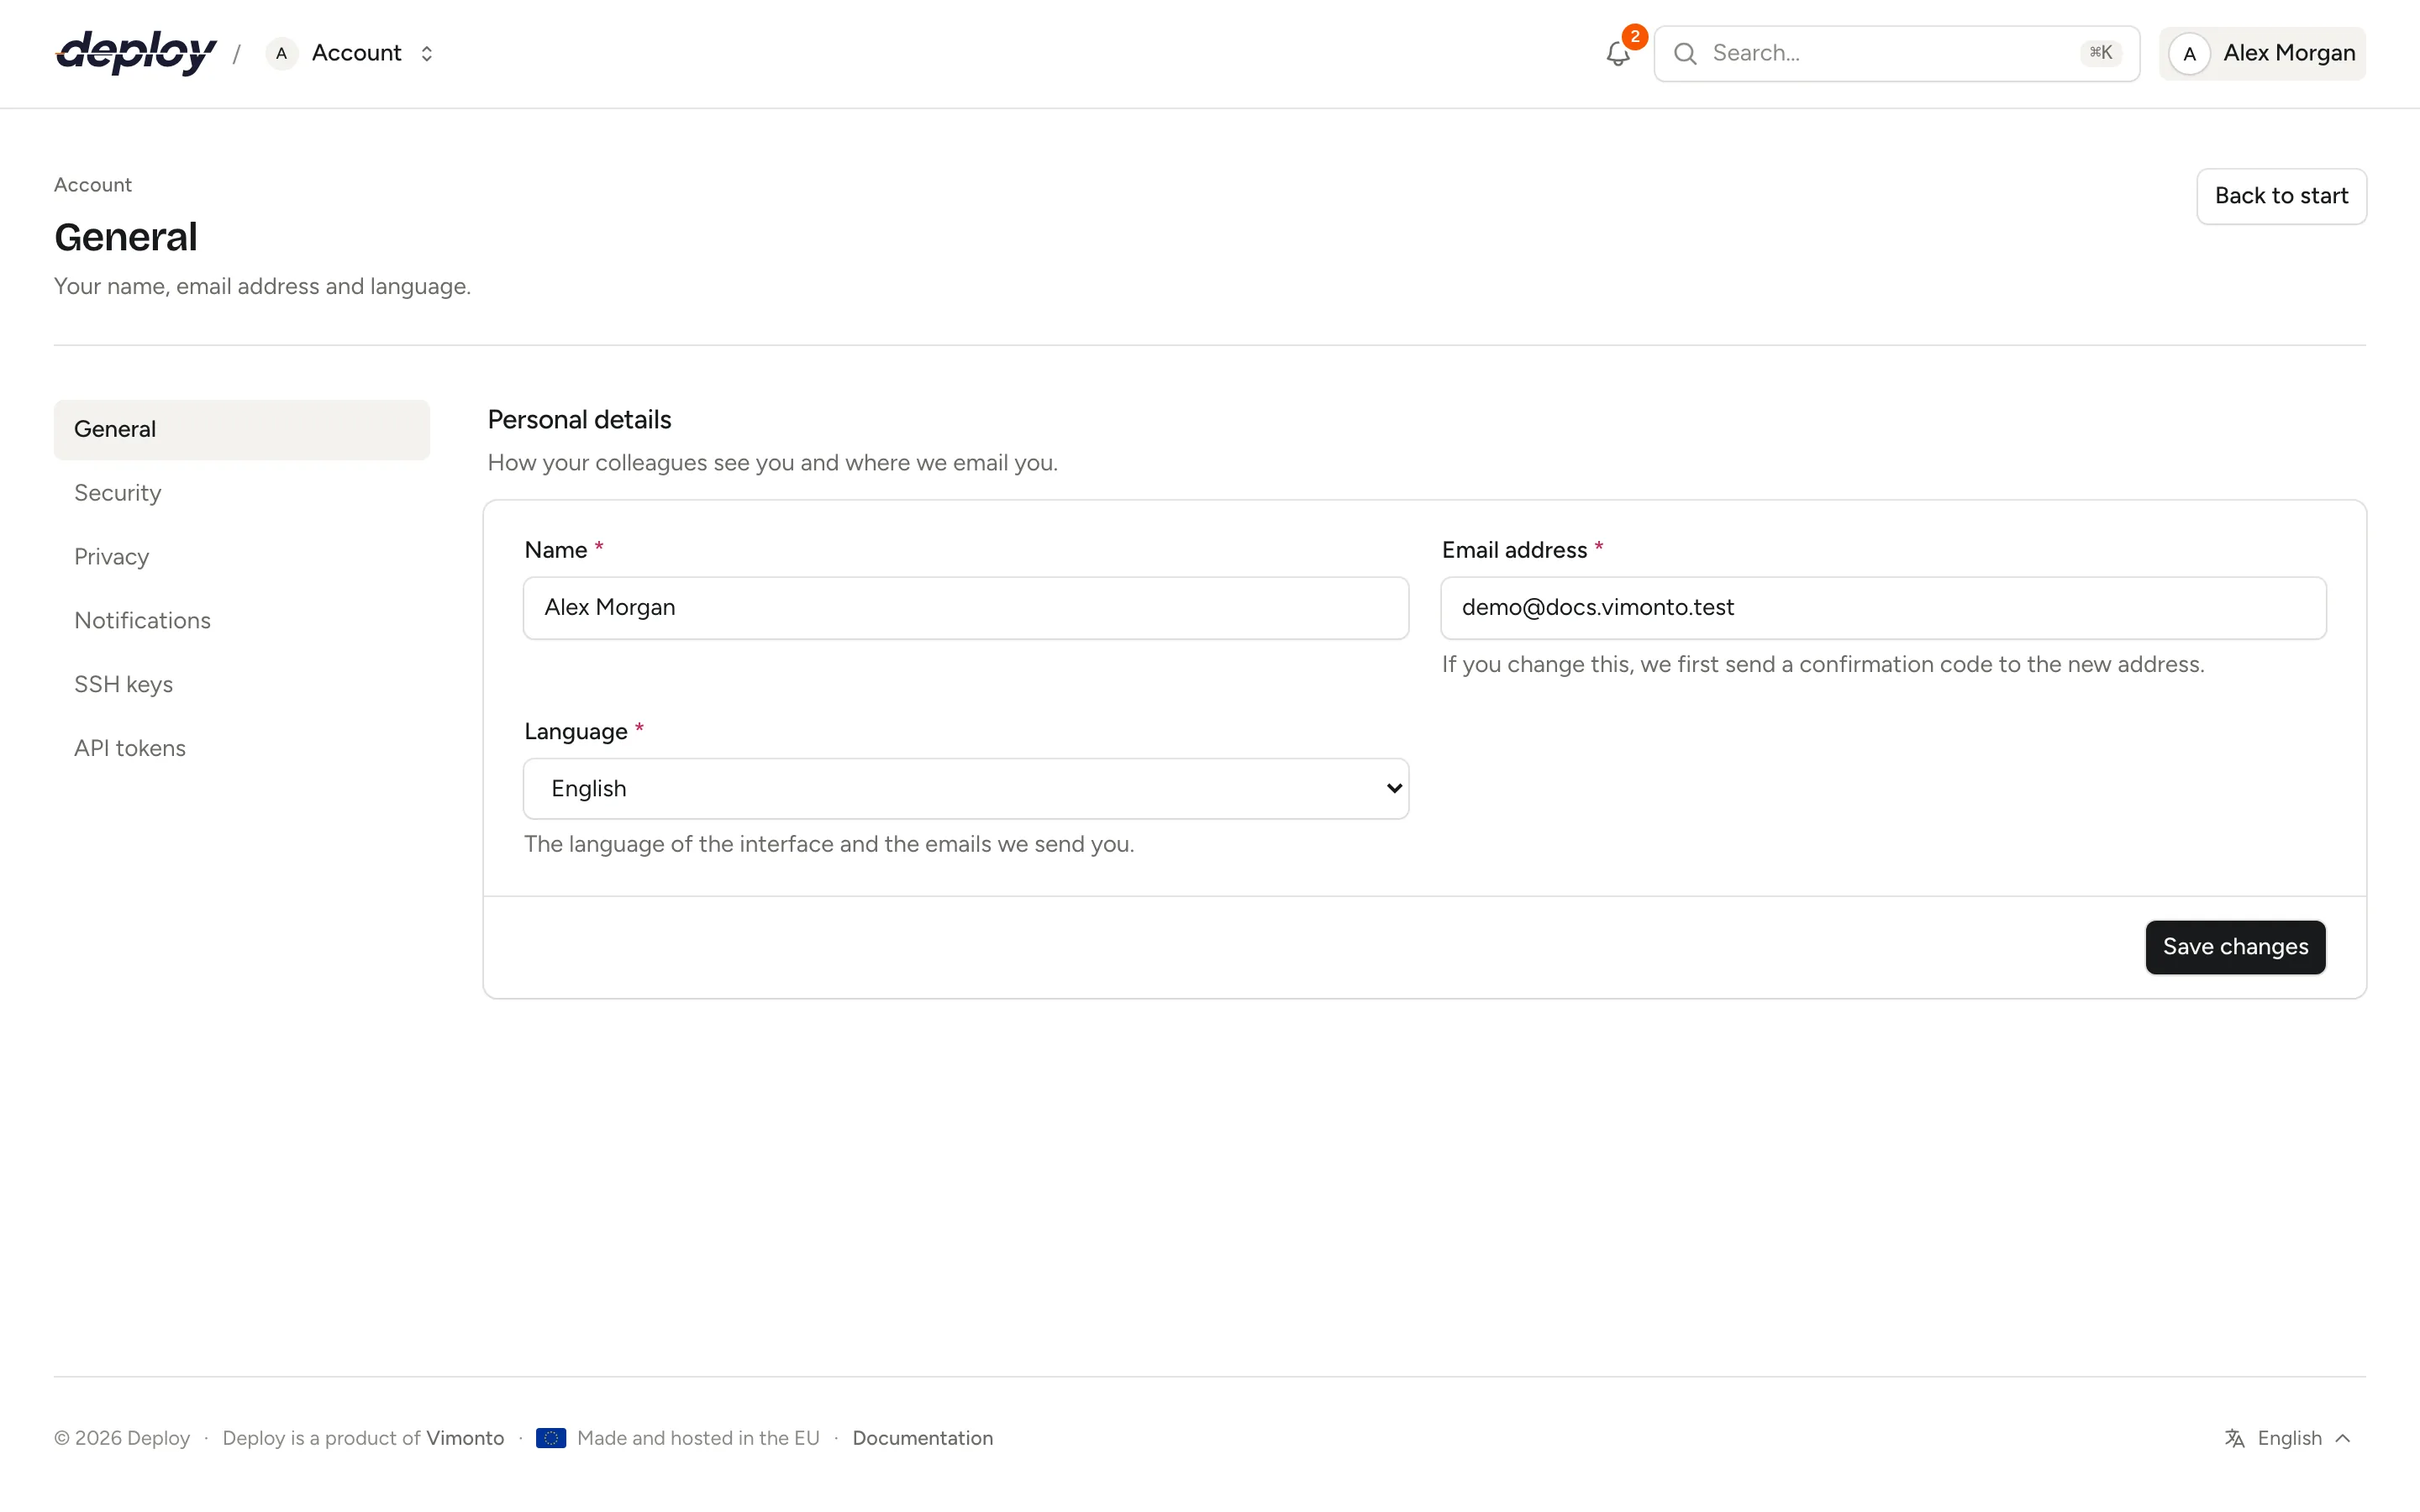
Change your name and language
- Open Account settings → General.
- Change your Name. This is how your colleagues see you, for example in the members list and on tasks you start.
- Choose a Language: English, Nederlands, Deutsch, Français or Italiano. It sets the language of the interface and of the emails we send you.
- Click Save changes.
When you change the language, the page reloads in the new language.
Change your email address
Your email address is never changed directly. We first check that you can receive email at the new address:
- Open Account settings → General.
- Enter the new Email address and click Save changes.
- We email a 6-digit code to the new address, and a notice about the change to your current address.
- Enter the code under Confirmation code and click Confirm email address.
Until you enter the code, your account keeps using your current address. A banner on the General page shows the pending change, with buttons to Enter code, Send a new code or Cancel change.
- A code is valid for 10 minutes.
- You can request a new code once a minute.
- The new address can't already be in use by another account.
After the change, you sign in with the new address. Invitations sent to your old address can no longer be accepted by your account, because an invitation only works for the address it was sent to.
Change your password
- Open Account settings → Security.
- Enter a New password and repeat it under Confirm new password.
- Click Change password.
You stay signed in in the browser tab where you changed it. Choose a long password you don't use anywhere else.
If you forgot your password, click Forgot your password? on the sign-in page to get a reset link by email.
Turn on two-step verification
Two-step verification adds a second step to signing in: after your password, you prove it's you with something only you have. Someone who knows your password can then still not sign in. You set it up under Account settings → Security, with one or more of these methods:
- Passkeys: your fingerprint, face or device PIN, through your computer, phone or a security key. The strongest and the quickest option, and a passkey can also sign you in without your password.
- Authenticator app: a 6-digit code from an app such as 1Password, Google Authenticator or Authy.
- Email codes: a code we email you. Simpler, but weaker: whoever can read your email can also reset your password.
Before you add or remove an authenticator app or a passkey, or make new recovery codes, Vimonto Deploy asks for your password under Confirm it's you. After that it doesn't ask again for 15 minutes. An account without a password (one an administrator created) clicks Email me a code and enters the code from the email instead. We email you each time a method is added or removed, so you notice if someone else does it.
Set up an authenticator app
- Open Account settings → Security.
- Under Authenticator app, click Set up and confirm your password.
- Scan the QR code with your authenticator app. Can't scan it? Enter the key shown next to it in the app instead.
- Enter the 6-digit code the app shows under Code from the app and click Turn on.
If the code is refused, check that the time on your phone is set automatically: codes depend on the clock. A code from the previous or next 30 seconds is still accepted, but each code works only once.
To remove the app, click Remove under Authenticator app and confirm.
Add a passkey
- Open Account settings → Security.
- Under Passkeys, click Add a passkey and confirm your password.
- Give it a Name you'll recognise, for example "Work laptop", and click Continue.
- Follow your browser's steps: use your fingerprint, face, device PIN or security key.
You can add several passkeys, for example one per device. The list shows when each was added and last used. To remove one, click Remove next to it and confirm.
Save your recovery codes
When you set up your first authenticator app or passkey, Vimonto Deploy shows ten recovery codes. Each one signs you in once if you lose your phone or passkey. Use Copy or Download and keep them somewhere safe, such as a password manager: this is the only time we show them. Then click I've saved them.
Under Recovery codes you see how many codes are left. Make new codes replaces them all: the old ones stop working right away.
If you remove your last authenticator app or passkey, Vimonto Deploy warns you first: your recovery codes are deleted with it, and organizations that require two-step sign-in are closed to you until you set one up again.
Turn on email codes
- Open Account settings → Security.
- Under Email codes, click Set up.
- We email you a code. Enter it under Verification code and click Enable.
Codes are valid for 10 minutes; click Resend code if one doesn't arrive. To turn it off, click Disable under Email codes, enter the code we email you and confirm with Disable.
Sign in with two-step verification
After your password, Vimonto Deploy asks for the strongest method you have: a passkey (Use passkey), then a code from your authenticator app, then a code by email. Under Other ways to sign in you can switch to another method you set up, or to Use a recovery code. Enter the code and click Confirm and sign in.
After five wrong codes you have to wait five minutes before you can try again.
Sign in with a passkey only
On the sign-in page, click Sign in with a passkey and choose your passkey. You don't need your email address or password: the passkey proves both that it's your device and that it's you (your fingerprint, face or PIN). Remember me works the same as with a password.
Add your personal SSH keys
Your personal SSH keys are public keys of the computers you use. You can put them on servers so you can log in over SSH from your own computer.
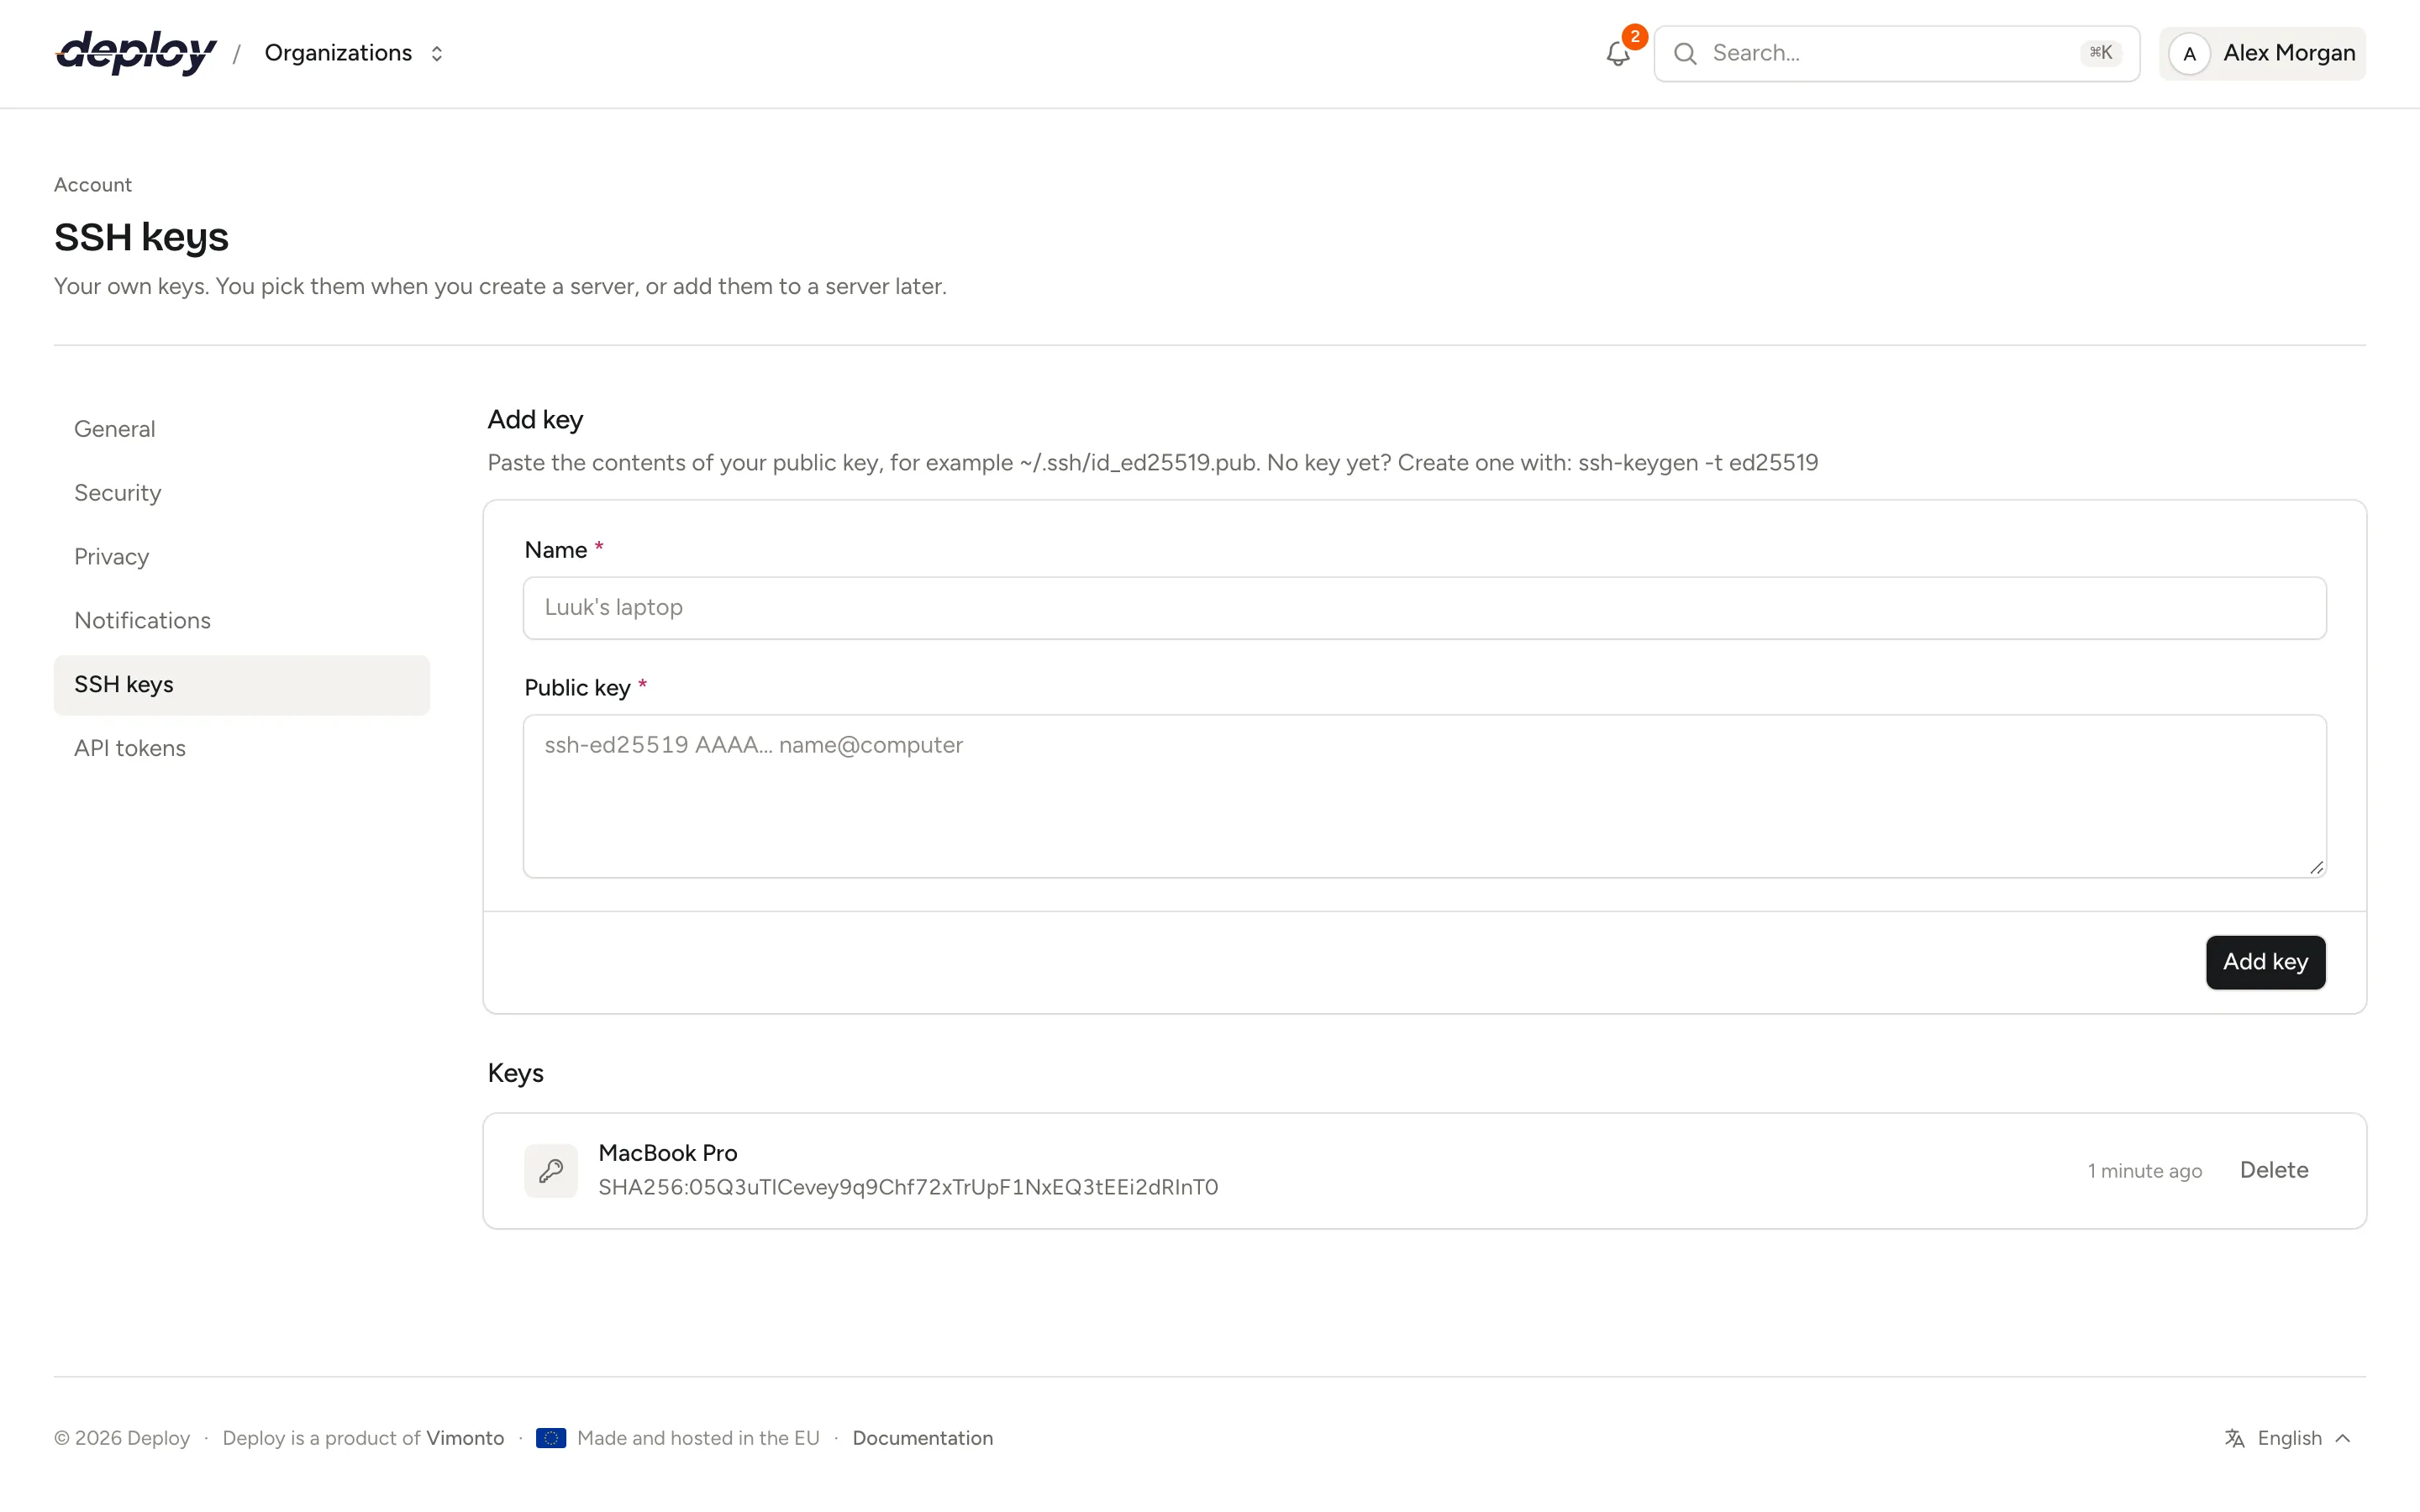
- Open Account settings → SSH keys.
- Under Add key, enter a Name, for example "Sam's laptop".
- Paste the contents of your public key under Public key, for example the contents of
~/.ssh/id_ed25519.pub. - Click Add key.
No key yet? Create one on your computer with:
ssh-keygen -t ed25519
Paste the public key (the file ending in .pub), never the private key.
Where are personal keys used?
- When you create a server, you can select your keys under Your SSH keys. They are added to the new server.
- On an existing server, open SSH keys in the server's sidebar, click Add key and pick one of your keys instead of pasting it again.
Personal keys are yours only: other members don't see them and they are not added to servers automatically. Keys that the whole team needs on every new server belong in the organization's SSH keys.
Deleting a personal key only removes it from your account: it is no longer offered for new servers. Servers that already have the key keep it until you remove it on the server's SSH keys page.
Choose your notifications
Under Account settings → Notifications you choose what Vimonto Deploy tells you about (failed deploys, monitor alerts, servers that are ready and more) and whether it reaches you by Email, In-app in the bell at the top of every page, or both. You can also mute servers. These settings are personal and apply to every organization you are in. See notifications.
Create API tokens
Under Account settings → API tokens you make tokens for scripts and CI pipelines that use the Vimonto Deploy API, for example to deploy from GitHub Actions. A token can do what you can do, limited to the scopes you give it, and it is shown only once. See the API.
Under Command line on the same page you find the command that downloads the Vimonto Deploy CLI and installs it, with Copy, and the Download the CLI link.
Choose a light or dark theme
Open the account menu at the top right. The theme switch has three options: Light, Dark and System, which follows the setting of your operating system. The choice is saved in your browser.
See which legal documents you accepted
The legal documents of Vimonto Deploy each have a version. The agreements (the terms of service, the data processing agreement, the acceptable use policy, the refund and cancellation policy and the data export and switching policy) are what you accept. The notices (the privacy policy, the cookie policy, the subprocessors, the consumer withdrawal information and the company information) are there to read: there is nothing to accept, and Legal marks them Notice. You accept the agreements by creating your account, as the sign-up form says under Create account. The documents are in English only, and Vimonto Deploy is a product of Vimonto: the documents are an agreement between you and Vimonto.
When a document gets a new version, the next page you open shows We updated our legal documents, with each changed document, its new version and what changed. Open a document with Read to see it in full, then choose Accept and continue. Until you accept, the dialog stays in front of every page; Sign out is the way out without accepting. An account that never accepted the documents, for example one an administrator created for you, sees Please accept our legal documents the first time it signs in.
Account settings → Legal shows each document with its current version and whether you accepted it, with the date. History lists every version you accepted, newest first, with the date and the IP address it was accepted from. Older acceptances are kept when you accept a new version.
Share usage data
To improve Vimonto Deploy and to help you when you ask for support, we record how you use the app while you're signed in:
- which pages of the app you open, by page name (for example "Server · Databases") and the organization it was in. Not the address of the page, nothing after it and not which server or site it was;
- what you do: signing in, the changes that also go in your organization's audit log (deploying, adding a server, changing a site), and calls to the API and the MCP server.
No IP addresses, browser details or anything you type are recorded with it. The anonymous statistics of the website and these docs are separate and don't know who you are.
The data is kept for 90 days and then deleted. Our administrators see it on your account when they help you, and added up with everyone else's to see which parts of the app are used. It is part of your data download and is deleted with your account.
To switch it off:
- Open Account settings → Privacy.
- Under Usage data, switch off Share usage data.
From then on nothing is recorded, and everything recorded so far is deleted right away. You can switch it on again at any time.
Download your data
You can download everything Vimonto Deploy keeps about you as one JSON file, for example to keep a copy or to take your data elsewhere.
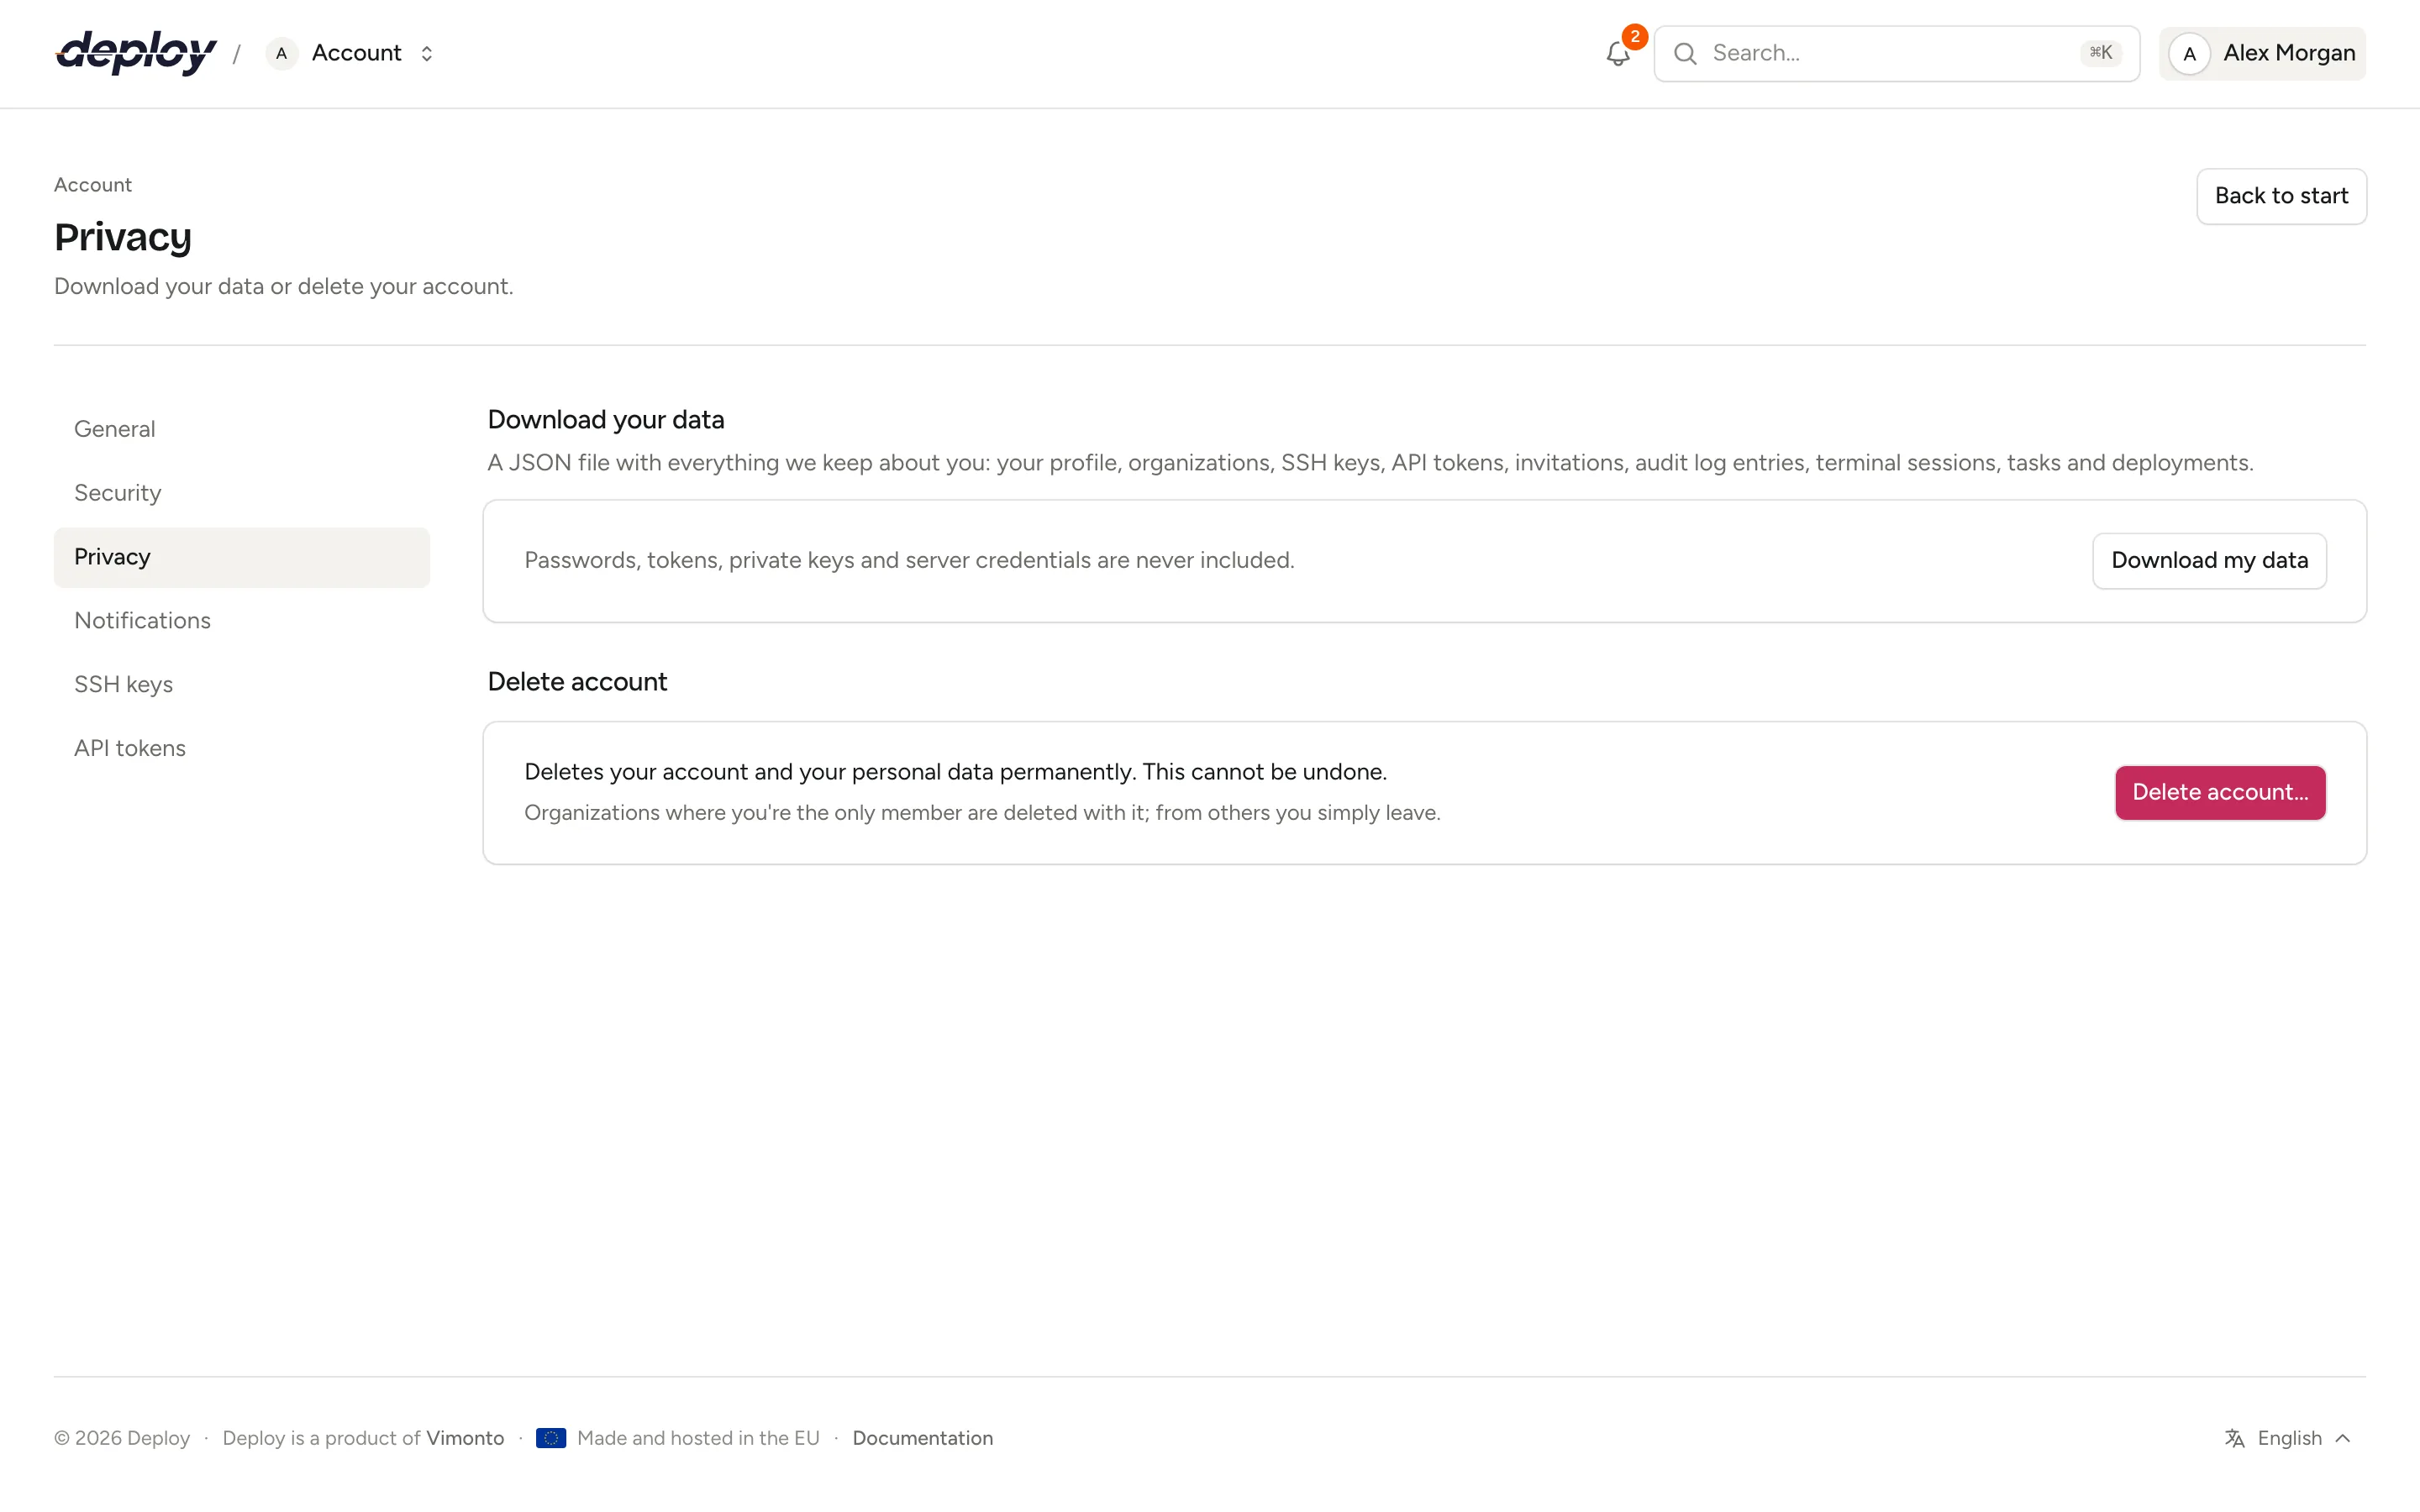
- Open Account settings → Privacy.
- Under Download your data, click Download my data.
The file is called vimonto-deploy-data- followed by the date, and contains:
- your profile: name, email address, language, when you signed up and verified your address, when you last signed in, whether email verification codes are on, when you set up an authenticator app, and the names and dates of your passkeys;
- your organizations, with your role and when you joined;
- your personal SSH keys (name, fingerprint and public key);
- your API tokens: name, permissions, last use and expiry;
- the invitations you sent and the ones sent to your address;
- your entries in the audit logs of your organizations, with IP address and browser;
- the terminal sessions you opened, the tasks you started and the deployments you triggered;
- your notifications and your notification settings;
- your usage data: the pages you opened and what you did, with the organization and the time;
- the versions of the legal documents you accepted, with the date, IP address and browser.
Passwords, tokens, private keys and server credentials are never included.
Delete your account
Deleting your account removes it and your personal data for good.
- Open Account settings → Privacy.
- Under Delete account, check Your organizations: it shows what happens to each of them.
- Enter Your password. An account without a password (one an administrator created) clicks Email me a code and enters the Verification code from the email instead.
- Click Delete account.
- Type your email address to confirm and click Delete account.
You are signed out right away, and we email a confirmation to your address.
After five wrong passwords or codes you have to wait a minute before you can try again.
What happens to your organizations?
- An organization you're the only member of is deleted with your account. It shows Deleted with your account, with its number of servers. Its servers at a cloud provider are deleted there first, just like when you delete an organization. In the confirmation you can switch off Also delete its servers at their providers to keep them running. If deleting them at the providers takes a while, your account stays until that has finished: then delete your account again.
- An organization you're the only owner of while others are still members stops the deletion. Under You can't delete your account yet, each one has a link to its Members page: make someone else an owner there first, or remove the other members.
- From every other organization you simply leave (You leave it).
What is kept, and what is removed?
Removed with your account: your profile and password, your sessions on every device, your API tokens, your personal SSH keys, your notifications, your usage data, your memberships and any pending email address change.
Kept, without your name: the tasks you started, the deployments you triggered, the terminal sessions you opened and the invitations you sent. Your entries in the audit logs stay as well, so organizations can still see what happened on their servers; they then show Deleted user instead of your name. The IP address and browser stored with those entries are removed with the entry after 365 days. Organization SSH keys you added stay in the organization, because the team uses them on its servers.
Emails about your account
Besides the emails you choose under notifications, Vimonto Deploy sends a few about your account itself, each only once:
- Welcome to Vimonto Deploy, when you have confirmed your email address, with the first steps and, for your first organization, until when its Premium trial runs.
- Need a hand getting started?, when you signed up two days ago but haven't finished the welcome yet. The button takes you back to where you left off.
- The trial emails described under billing: the day before the trial ends, and when it has ended.
What happens to an account that isn't used?
An account counts as unused when none of its organizations has a server, a connected cloud provider or Git host, a subscription, a running trial or a billing exemption. Administrators of the platform are never counted.
When an account has been unused for a month, counted from when you signed up or last signed in, you get Can we help you get started?, an offer of help that also says on which date the account will be deleted. To keep the account, sign in before that date, or set something up. If you don't need it anymore, you don't have to do anything: a month after that email, the account is deleted the same way as when you delete it yourself, and you get an email that it's gone. You're welcome to sign up again later.
An account that is a member of an organization with servers is never unused. An account that is the only owner of an organization others still use is never deleted this way.
Frequently asked questions
Is my account linked to one organization?
No. One account can be a member of many organizations, with a different role in each. Switch between them with the organization menu at the top left. See organizations.
I didn't receive the email code. What can I do?
Check your spam folder, then use Send a new code or Resend code. You can request a new code once a minute, and each code is valid for 10 minutes.
Does Vimonto Deploy support authenticator apps?
Yes. Any app that makes time-based codes works, such as 1Password, Google Authenticator, Microsoft Authenticator or Authy. You can also use passkeys, or codes by email. See turn on two-step verification.
I lost my phone. How do I sign in?
Use one of your recovery codes: after your password, choose Use a recovery code under Other ways to sign in. Then remove the lost device under Account settings → Security and set up a new one. No recovery codes left? Contact support.
Why do I see a different language than my colleague?
The language is a personal setting. Each person chooses their own under Account settings → General, and emails follow that choice too.